 How do teachers provide students with regular opportunity to write and compose at the keyboard when there are just a few student computers in the classroom? Vickie O’Donnell at East Broad Street K-8 school had a fabulous idea and we put it to the test. Why Create a Writing Kiosk?Ms. O'Donnell had a list of needs for her students...
The Basic Classroom plan.Day One Provide pre-writing activities Day Two Students respond to a writing prompt by rotating through the writing center kiosks, teacher views responses from her Google account. Day Three Analyze Class views and discusses the teacher selected exemplars from the projection screen. Class sets writing goals for next prompt. Repeat weekly Google Forms to the Rescue!Google Forms was chosen as the tech tool to meet the needs of Ms. O'Donnell's students and writing plan. Google Forms is a free form survey tool with loads of options for data collection. The directions provided in this writing are specifically designed for Ms. O'Donnell's needs but could be adapted for your classroom. Teacher Setup:
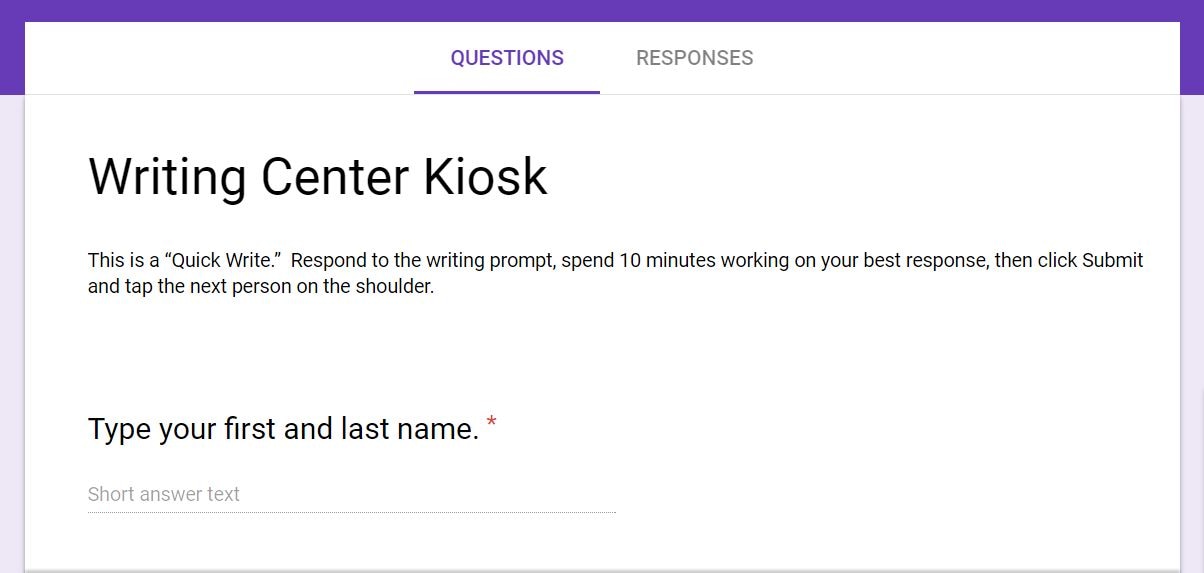 *In the sample above, the first untitled question is used as the student name field. If the students will not be logging into their Google accounts to access your form, you’ll most likely want to include this question. If students are logging into their Google accounts, their email addresses will appear in your results with the student writing automatically, so the student name question would not be necessary.
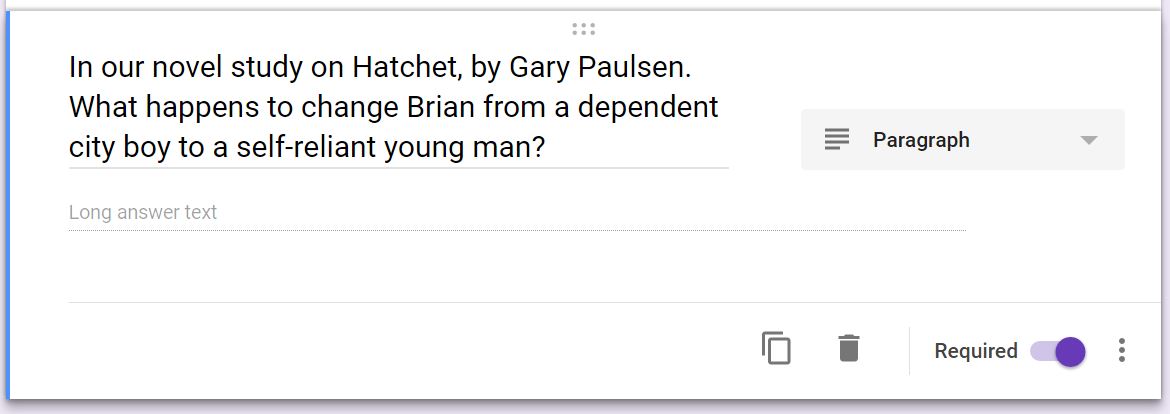 Type or paste your writing prompt into the question field. Change the question style from Multiple choice to Paragraph so that the students will have enough room to compose their complete response. Be sure to make this question, as well as the student name question required questions by changing the indicator in the lower right hand corner of the question box. 6. Change some settings: Click the gear icon at the top of your screen.  Since we are setting up a kiosk, it will be important to change a few settings to make life easy. On the General tab
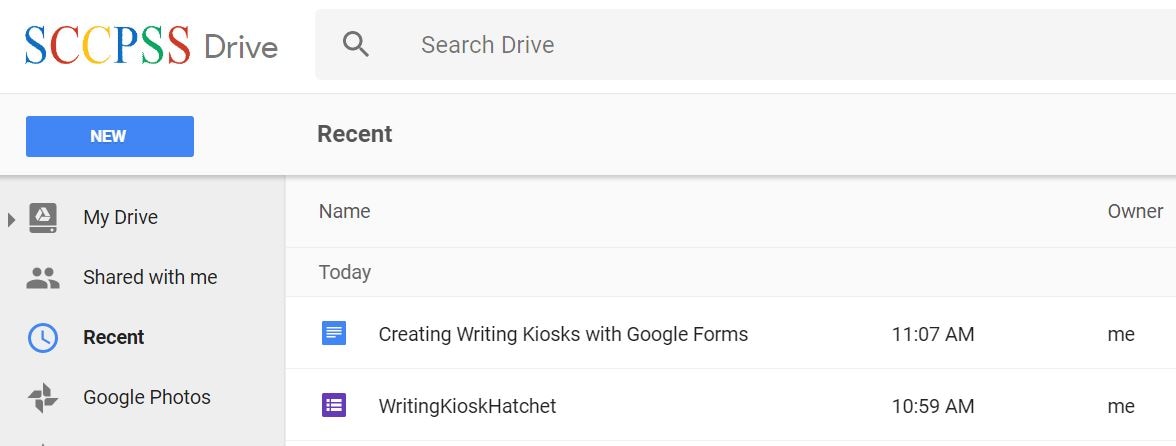
7. Preview your Form: Click the eyeball icon at the top of your screen.  You are now previewing your Google Form. Now click the pencil to go back to your editing screen. Make any changes and then click SEND. 8. Copy the link of the Form: Since students are working at a writing kiosk in this example - all we need is the URL of the form. Click the Link icon in the center of the window so that the Link to the form appears in the box. 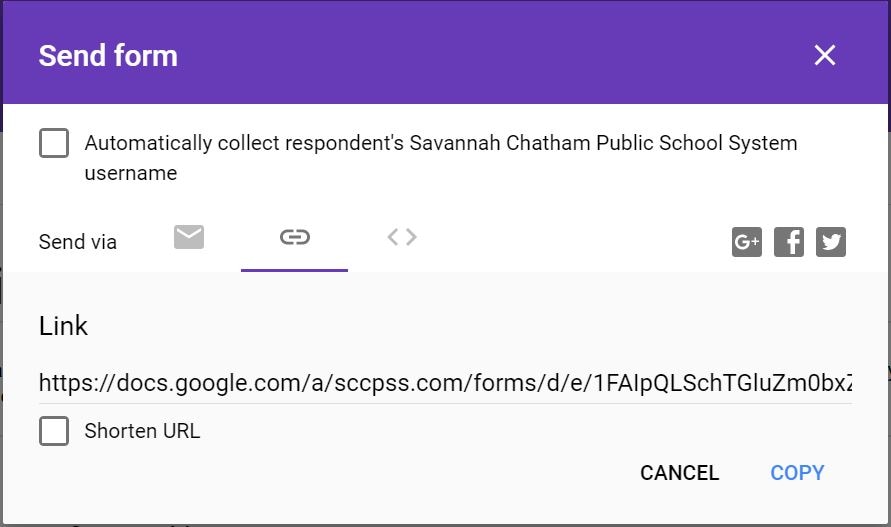 The link is ridiculously long for students to copy - but don’t worry! We’ll shorten it, but not with the check box because the link still won’t be short enough. Instead, click COPY to copy the link. 9. To shorten the link. Let’s use Google’s URL shortener. a. Open a new tab in your browser and type goo.gl in the omni-box and press enter on your keyboard.  b. Paste your link into the long box and then click SHORTEN URL.  c. Voila! You now have a short URL to write on the board, an index card, a sticky note - whatever! And if a student accidentally closes the window, it will be easy to re-enter the URL because it’s so short! Your screen should look something like mine. If you are not requiring students to log in, you’ll see a preview of your form. You'll see a preview of the district login screen if you require students to log into their Google accounts, 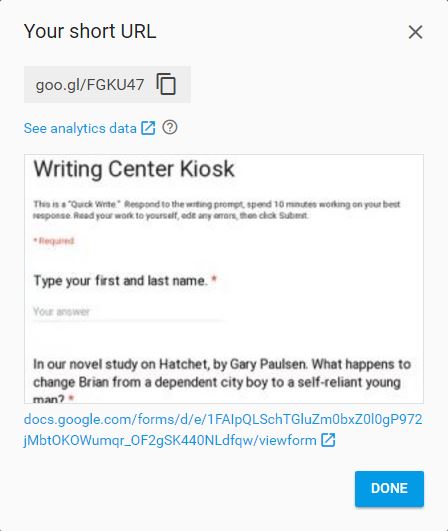 10. TEST your short URL. Go to a different browser or computer and type the short URL in the omnibox (not the search field of Google) press enter. You should now be viewing your live form with your writing prompt ready for student use. *Short URLs are case sensitive Time to Write!Give the URL to the students, and let writing rotations begin in whatever routine suits your classroom. When students are finished writing, they will click submit and your custom message will appear. The next student will click "Submit another response" to refresh the Form and begin their writing activity.  View student responses, Set Class Writing GoalsWhen you are ready to read the student responses or show exemplars to the class, you’ll need to locate your Form responses.
 2. View Student responses: Click the Responses tab. The number to the right of the responses tab indicates the number of responses. You can change your view from Summary to Individual responses. 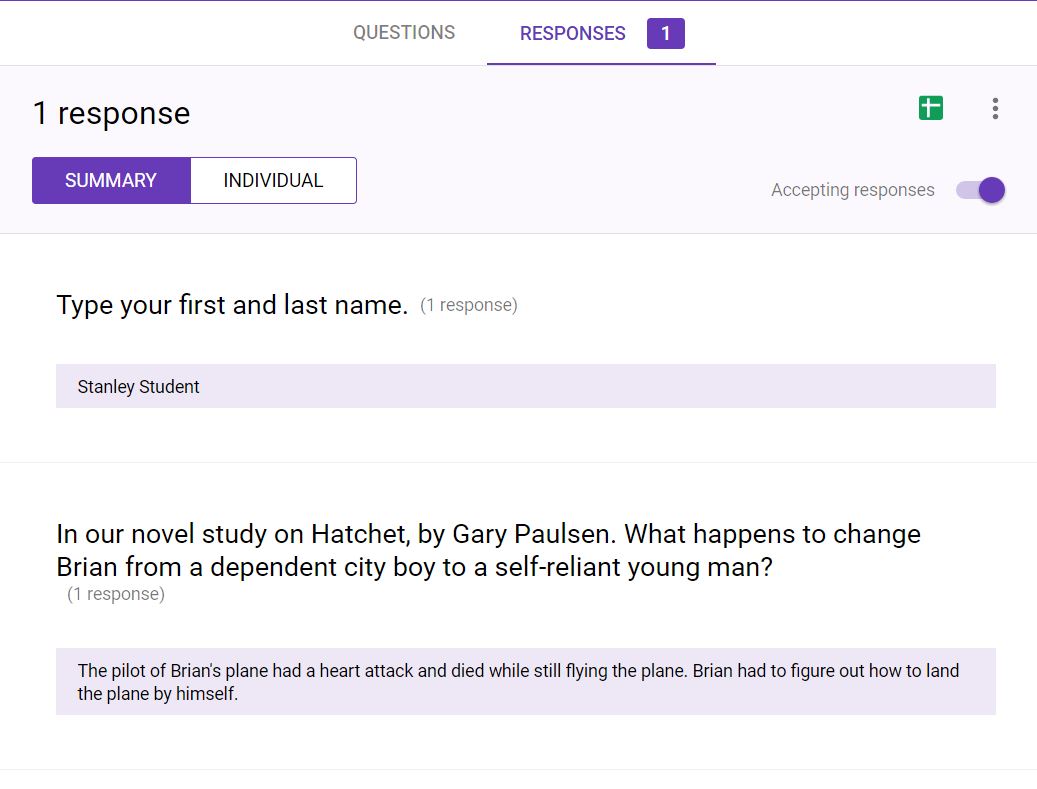 3. Discuss exemplars/edits/improvements and set goals with the class by projecting the student writing anonymously. In the example above, there is only one response, so it is quite obvious that the writing sample was submitted by Stanley Student. With an entire class of responses, you’ll be able to scroll past the student names and view only the student writing.
4. Timestamps! If you want/need a timestamp you can view the responses in columns from a spreadsheet. A timestamp column will appear automatically. If spreadsheets are not your thing, you could add an additional question to the form to have the students either enter the time, or class period. If you need support with a project like this, contact your IT coach. We’d love to hear about your writing kiosk experiences. How does it work in your classroom? Leave a response in the blog post below.
1 Comment
2/21/2018 02:18:10 pm
An internet marketing agency is a skilled group of people who provide a complete internet marketing package which includes various tools and techniques to enhance the company's presence on the internet. With the growing usage of internet and online transactions, it has become unavoidable to not be on the internet. If you want your business to do better than your rivals and make continuous growth, you need to be where the game is. Leave a Reply. |
Angie LaPlanteTechnology Teacher 
Categories
All
Archives
June 2018
|
 RSS Feed
